
NativeScript Playground is an awesome environment for building iOS and Android apps in your browser.
One of Playground’s features is the ability to use NativeScript plugins that don’t depend on iOS and Android frameworks. In this article I’m going to show you how to find plugins you can use, and how to integrate those plugins into your Playground apps. Let’s get started.
Can I use [insert plugin name here] in Playground?
First things first, let’s look at how you can tell whether a plugin is usable in Playground or not.
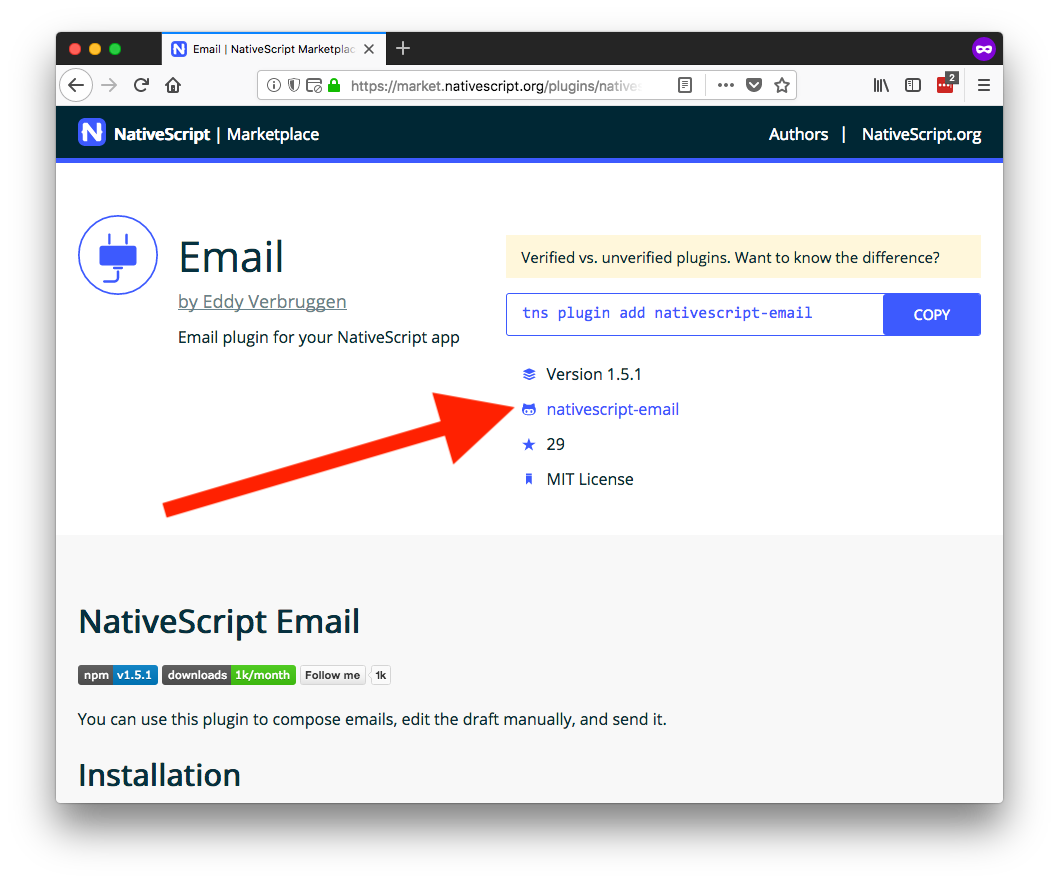
As an initial step, find the plugin you want to use in the NativeScript Marketplace, and click that plugin’s GitHub link. For example, here’s the page for the NativeScript email plugin with an arrow pointing to the link in question.
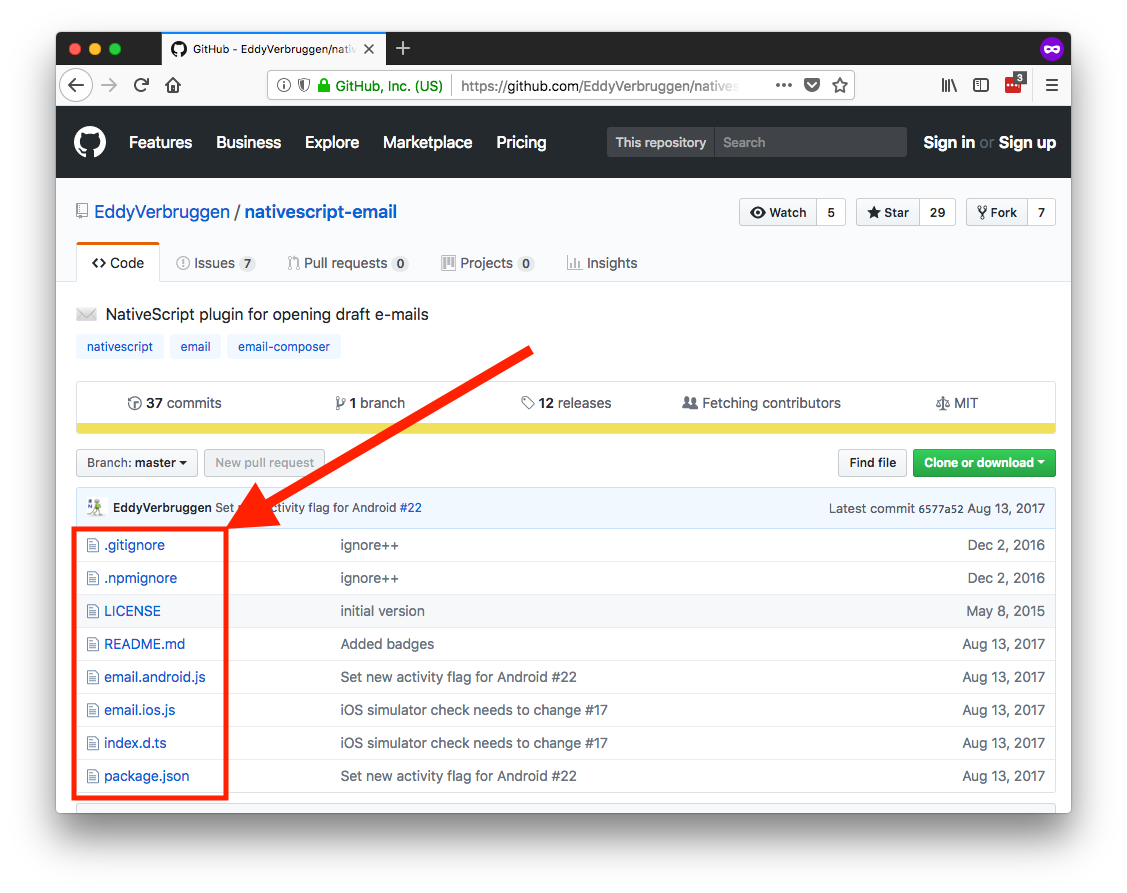
NativeScript plugins that depends on native SDKs must have a platforms or a src/platforms folder. So once on GitHub, see if your plugin has one of those folders in its file tree. The NativeScript email plugin, for example, does not have a platforms folder (note the lack of a platforms folder in the red box below), therefore it is eligible for use in Playground.
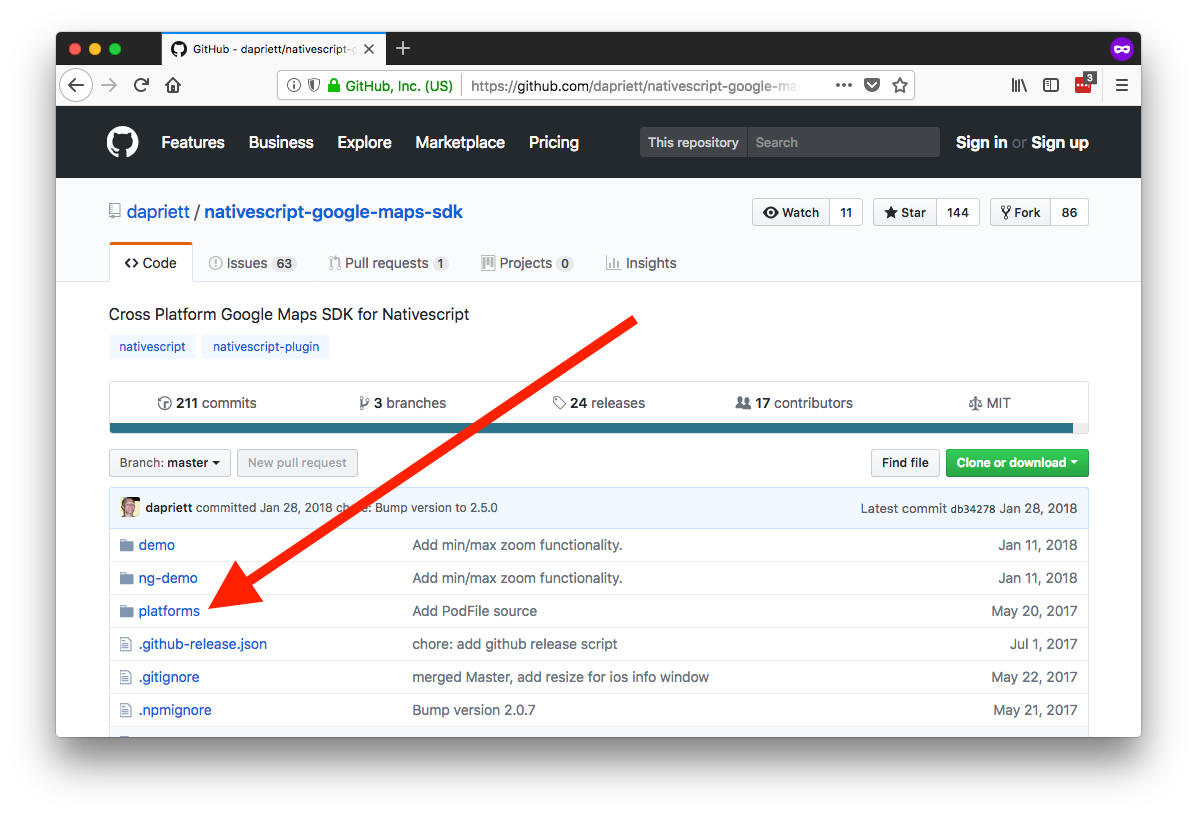
Conversely, the NativeScript Google Maps plugin does have a platforms folder, therefore is is not eligible for use in Playground.
NOTE: There are a few exceptions to this rule, as Playground does support a handful of plugins with native SDK dependencies. Specifically, Playground supports the geolocation plugin, the Kinvey plugin, and the NativeScript UI plugins. Playground will also soon support the camera plugin, Fresco plugin, IQKeyboardManager plugin, and more. You can request plugin support on the NativeScript/playground-feedback GitHub repo.
How do I install plugins in Playground?
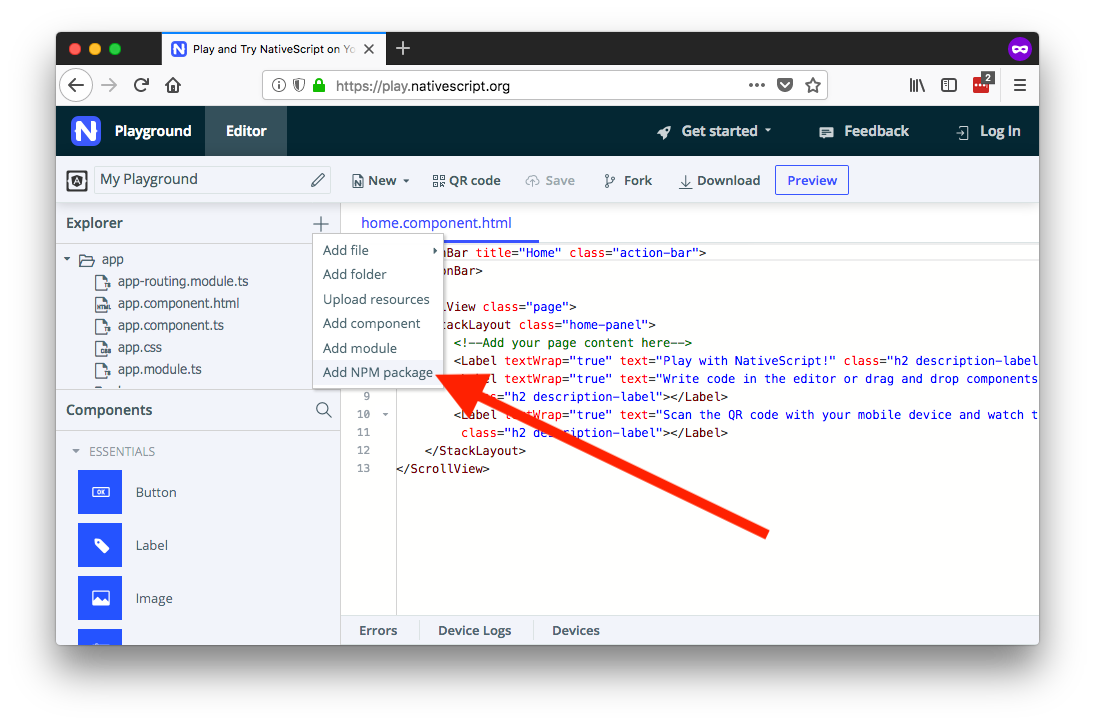
Once you have the plugin you want to use ready, start a new Playground project on play.nativescript.org.
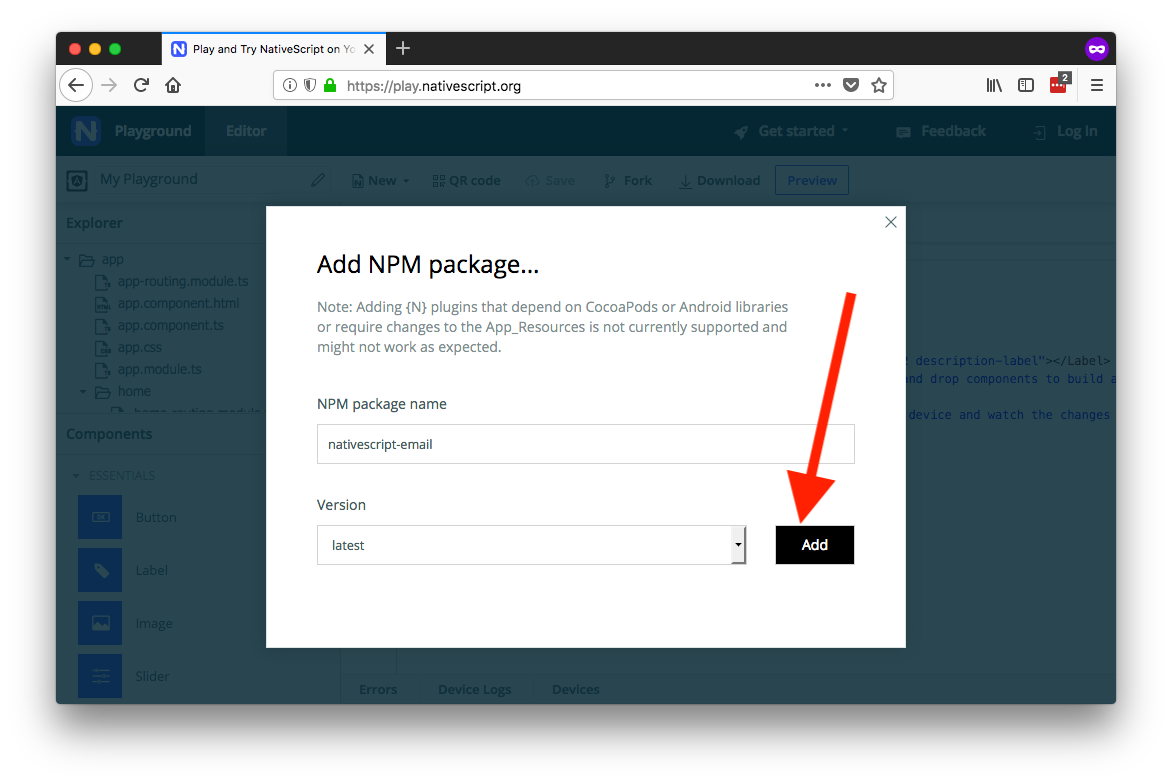
Next, find the + button on the left-hand side of the screen, and select the Add NPM package option.
After clicking the option you’ll see a dialog where you have to enter the plugin’s name on npm (see image below). Do that, select a version, and then click the Add button.
TIP: The plugin’s npm name is the value you pass to
tns plugin addwhen using the plugin through the NativeScript CLI. For example, you install the NativeScript email plugin usingtns plugin add nativescript-email, therefore,nativescript-emailis the plugin’s name on npm.
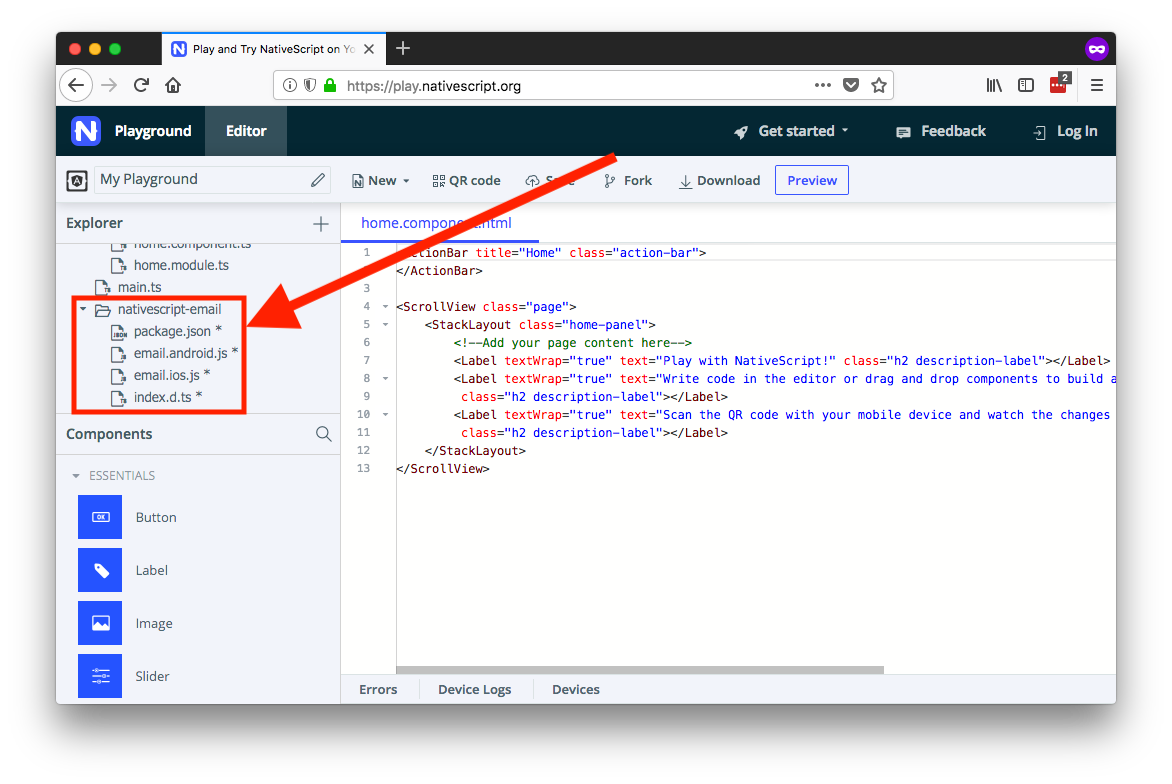
After the install, you’ll see the plugin appear in your project’s file explorer.
How do I use plugins in Playground?
With the plugin installed you’re now ready to use the plugin in your app. Using a plugin in Playground is the same as using a plugin anywhere else, with one key difference—the path you use to import the plugin.
For example, the NativeScript email plugin’s documentation notes the following import instructions.
// For apps using TypeScript
import * as email from "nativescript-email";

// For apps using JavaScript
var email = require("nativescript-email");
This code will not work in Playground, because in Playground, the plugin is part of your app’s app folder. Meaning, the path you need to use to import the plugin must be relative to the file you’re using it in.
For example, suppose I want to use the NativeScript email plugin in a new NativeScript app’s app/home/home.component.ts file. To do so I would use the following syntax.
import * as email from "../nativescript-email";
NOTE: In a JavaScript app you would use
var email = require("../nativescript-email);.
And… that’s it. With that slight tweak to the import syntax the plugin should now work as expected. For example here’s the email plugin in action.
TIP: Here’s a link to the example running in the gif above in case you want to try it out for yourself.
Have fun using plugins in Playground! And if you hit any issues let me know in the comments.