
One commonly requested, and non-trivial requirement PhoneGap/Cordova apps often have is Facebook integration. To perform the actual integration, hybrid Cordova apps have an advantage over traditional web apps: they can leverage the platform’s native Facebook APIs.
The bridge between the JavaScript APIs and the native APIs takes the form of a Cordova plugin, named - crazily enough - the Cordova Facebook Plugin. In this article we’ll give a step-by-step guide to integrating this plugin into an AppBuilder application; then we’ll see what we can do with it.
Note: If you want to cut straight to the chase, the final example with the integration complete is available at https://github.com/tjvantoll/Facebook-Connect. You can clone this project directly in AppBuilder.
Adding the Plugin
The first step to adding the plugin is to download it from https://github.com/phonegap/phonegap-facebook-plugin - just click the Download ZIP button.
Then, with your project open in AppBuilder, select the Plugins directory, and select Add –> From Archive from the menu bar.
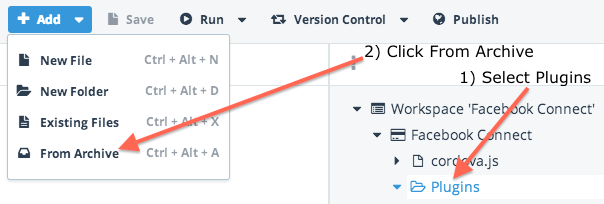
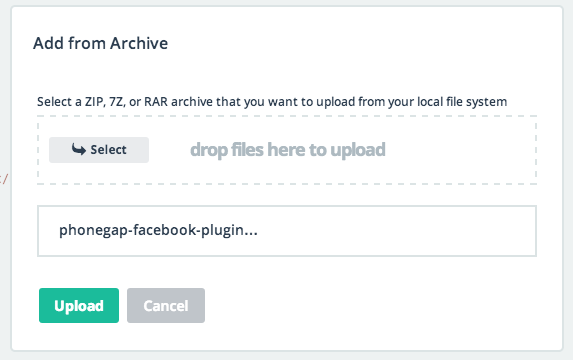
Select the ZIP file we just downloaded and click Upload.
Now add the following two <script> tags to your project’s index.html file:
<script src="cdv-plugin-fb-connect.js"></script>
<script src="facebook-js-sdk.js"></script>
The plugin is now a part of your project, but before we dig into the its APIs, we have a bit of configuration we have to change.
Configuring the Plugin
In order for the Cordova plugin to speak to the native Facebook APIs, it has to know the id and name of your Facebook application. To get this, head over to https://developers.facebook.com/ and login to your app’s dashboard settings. (If you don’t have an app built in Facebook, you’ll need to create one.) Here’s what my app looks like:
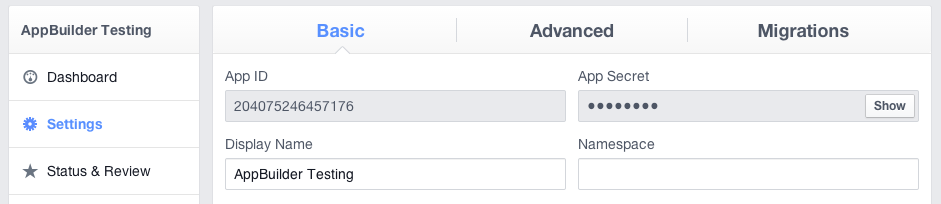
The two things we’re interested in are the App ID and the Display Name. Take note of these and head back to AppBuilder, as we need to add these configuration variables to the plugin’s plugin.xml file. Start by opening up plugin.xml and removing the two <preference> tags shown below.

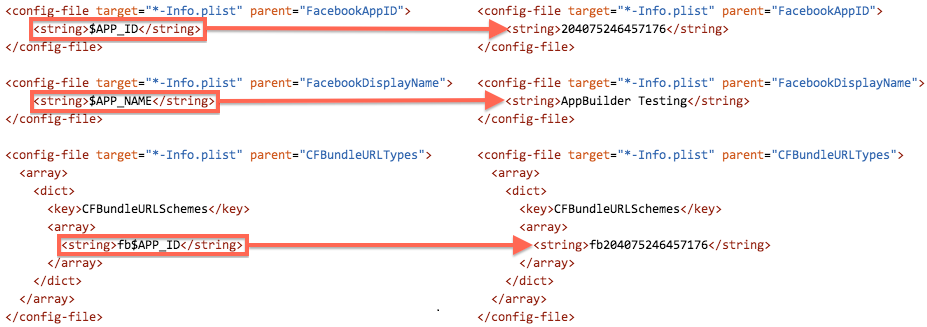
In Cordova plugins, plugin.xml files’ <preference> tags are placeholders; they’re a way of indicating that you need to change these strings elsewhere in the file. In the case of this plugin, you’ll find APP_ID and APP_NAME used a few times as shown in the image below. You’ll need to update the placeholder values with your app’s actual data.
And that’s it! We now have Facebook integrated into our app, including the ability to use the full Facebook JavaScript SDK. So what can we do with it?
Using the Facebook JavaScript SDK
Facebook’s APIs are provided through a FB global variable, and the first thing you must do with it is call FB.init().
FB.init({
    appId: "204075246457176",
    nativeInterface: CDV.FB
});
You can see that we again need to provide our Facebook’s app id. We also need to set a nativeInterface property to CDV.FB. You won’t find this property on Facebook’s documentation, but it’s what tells the Cordova plugin to step in and do its thing.
From here, there are several things we can do, but most of them require the user to be logged into Facebook. We can check whether the user is logged in using FB.getLoginStatus().
FB.getLoginStatus(function( response ) {
    if ( response.status === "connected" ) {
        alert( "logged in" );
    } else {
        alert( "not logged in" );
    }
});
Or we can just prompt the user to login with FB.login(). Like most of Facebook’s API methods, the first argument to FB.login() is a callback function to run when the login completes. The second argument is an object with a single scope property. The scope property needs to contain a comma delimited list of permissions your application needs. Here, we’re asking the user to give us access to their email address.
FB.login(function( response ) {
    // Handle the response
}, { scope: "email" });
Note: Refer to Facebook’s SDK documentation for a full list of the permissions you can request.
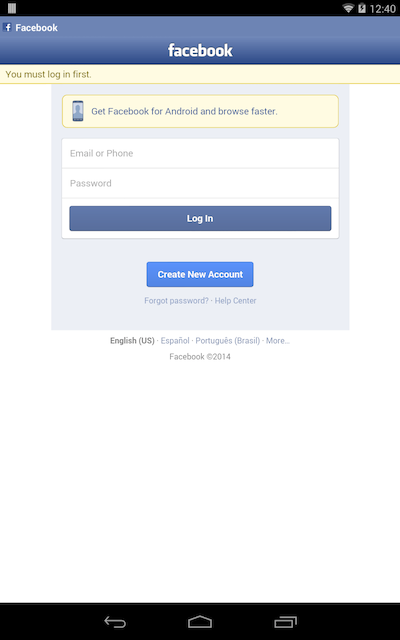
When you call FB.login(), if the user is not logged in, they’ll see a Facebook login form in a popup.
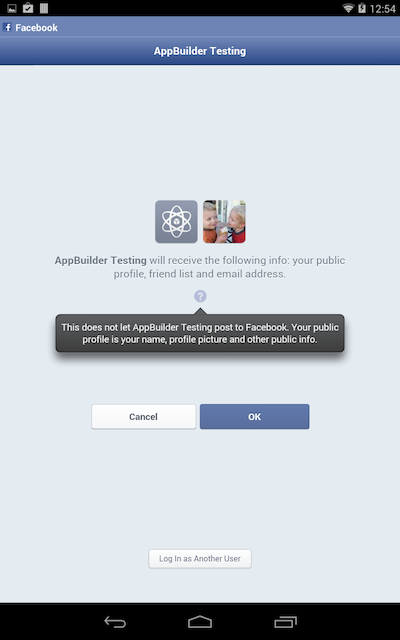
If they are logged in, they’ll have to confirm that they want to give your application access to the information you requested.
Once they have given access, you can use Facebook’s API to access what you need. For example the following retrieves the id, name, and picture of the user’s friends.
FB.api( "/me/friends", { fields: "id, name, picture" });
Wrapping up
To show this API in action, I built an AppBuilder app that logs the user in, and displays their friends in a Kendo UI Mobile ListView. The app is available at https://github.com/tjvantoll/Facebook-Connect.
If you try this out, please let me know if everything works alright for you in the comments below. If there are any additional integrations or examples you’d like to see, let me know that as well.